In this example, we will create a node using an input terrain that exposes a parameter named "Strength" and edit its graph. The output is a terrain with values that are the result of the input terrain's values plus the Strength value.
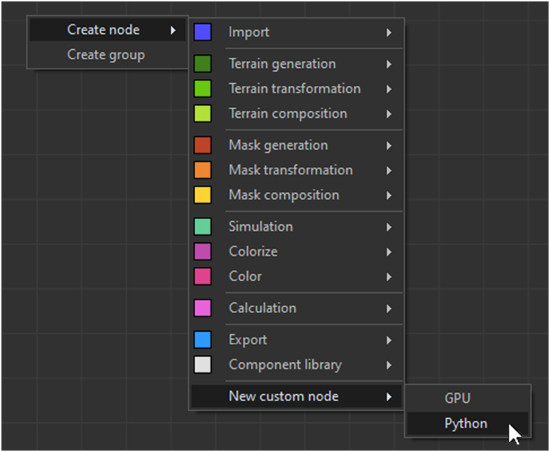
- Select Create node > New custom node > Python.
- Right-click on the node and select Rename to rename it.
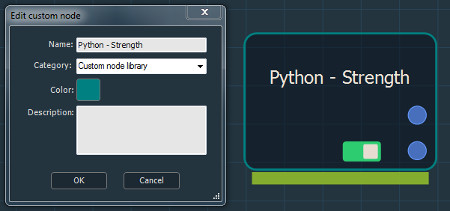
- Right-click on the node and select Edit custom node from the contextual menu to edit the node.
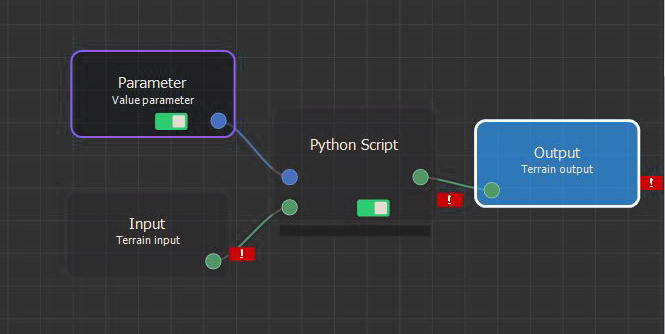
- Delete all default nodes except the Python script node and then:
-
- Create an input node by selecting Inputs > Terrain, and name it Input (default value).
- Create a parameter node by selecting Parameters > Value parameter, and name it Strength.
- Create an output node by selecting Outputs > Terrain, and name it Output (default value).
- Link these nodes to the Python Script node.
The nodes are invalid because there is no input terrain linked to the custom node.
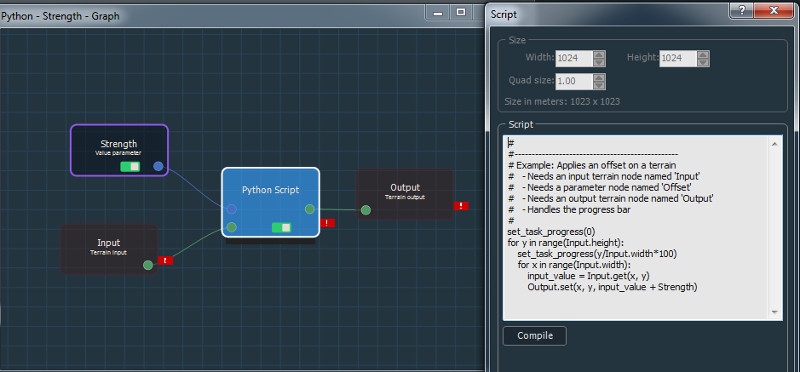
- Select the Python Script node and enter the following code in
the script editor:
#
#------------------------------------------------
# Example: Applies an offset on a terrain
# - Needs an input terrain node named 'Input'
# - Needs a parameter node named 'Strength'
# - Needs an output terrain node named 'Output'
# - Handles the progress bar
#
set_task_progress(0)
for y in range(Input.height):
set_task_progress(y/Input.width*100)
for x in range(Input.width):
input_value = Input.get(x, y)
Output.set(x, y, input_value + Strength)
- Click Compile to check for any errors.
- Close the custom node graph and go back to main graph window. Your custom node is now displayed with an input terrain connector and an output terrain connector.
- Link your custom node to an input terrain and watch the script running.
