This example demonstrates how to prepare a terrain with the best possible snow effect.
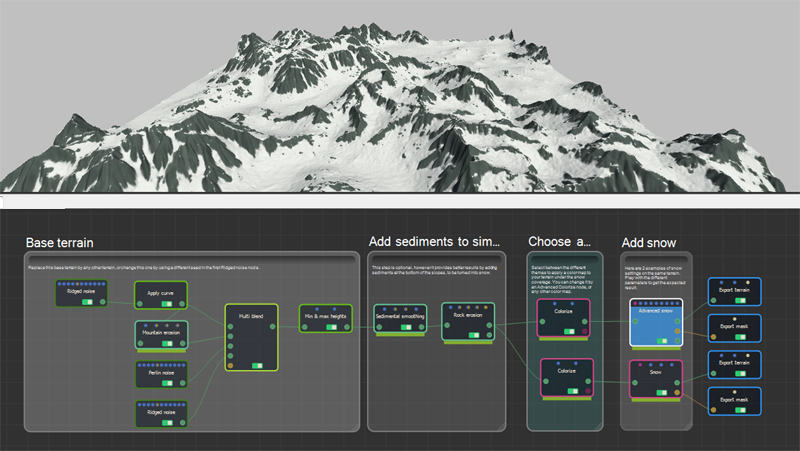
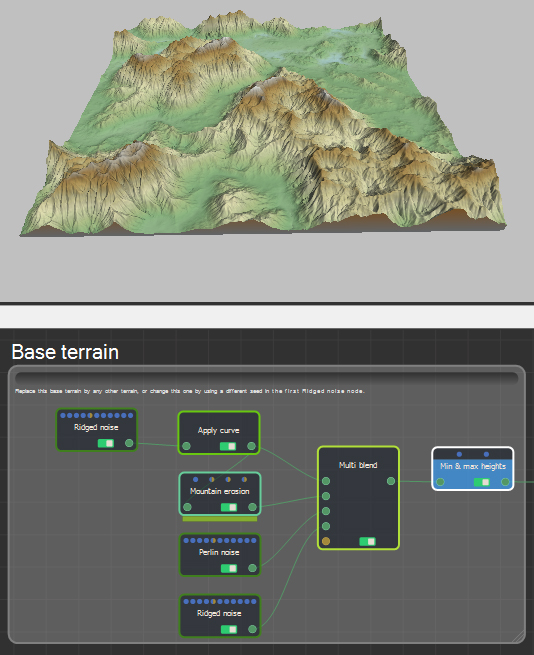
- Create a base terrain. Here we have created a terrain from a Ridged noise to which we applied a curve and then a mountain erosion. The result is combined with noises at different scales (Perlin noise and Ridged noise).You can replace this terrain with any terrain of the same size (1024x1024).
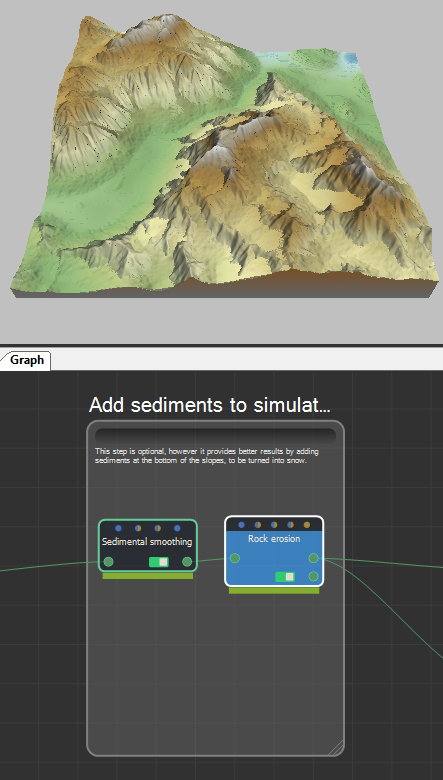
- Add sediment to the base of the slopes. The terrain relief is smoothed by combining the action of sedimental smoothing and rock erosion. Sediment is added to the base of the slopes and will be used to cover the snow. You can decrease the amount of sediment deposited by changing the parameters of these nodes.
- Colorize the terrain. Choose between the different themes of the Colorize node, use the Advanced Colorize, or apply a color map of your choice. In our example, we have applied two different themes from the Colorize node.
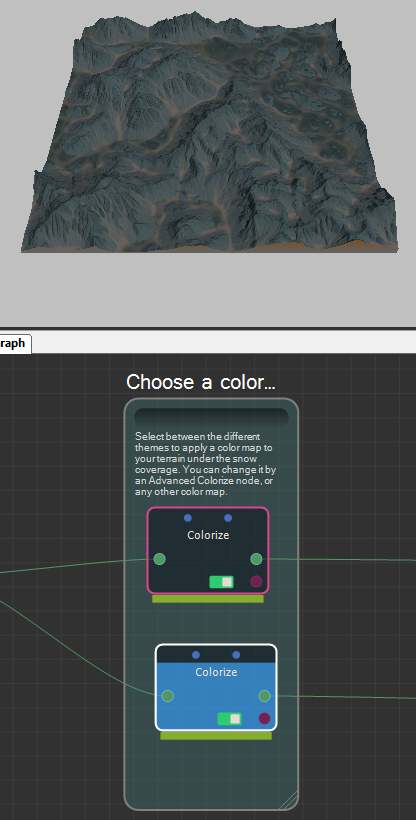
Except in the rare case where snow covers all the terrain, it is important to apply a color map to your terrain if it does not already have one.
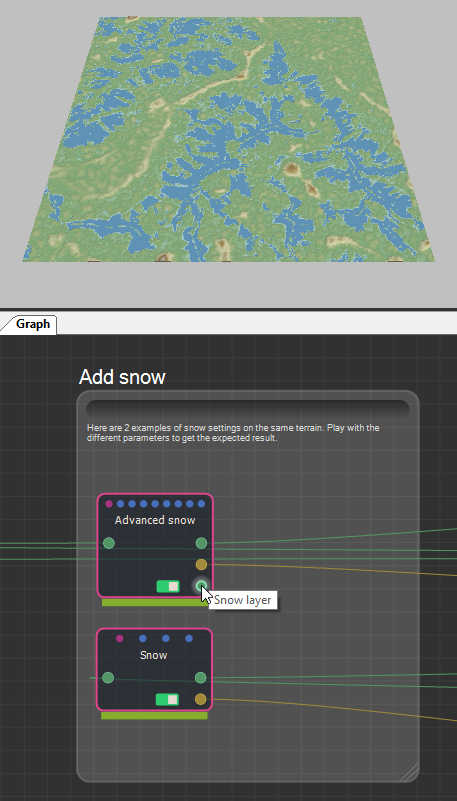
- We used the Snow node and the Advanced Snow node to create two different results from the same terrain. Play with the different settings to achieve a variety of results.

The Snow node does not modify the terrain. Snow is
a color map that is added on top of the existing color map in
places set by the parameters.
The Advanced color map node slightly modifies the terrain by adding
a layer of snow. This additional layer can be extracted using the
node's last output connector "Snow layer".
Copyright © 2022 · All Rights Reserved · Wysilab