Adding a Mask from convexity node
This node creates a mask from the convexity of a terrain.
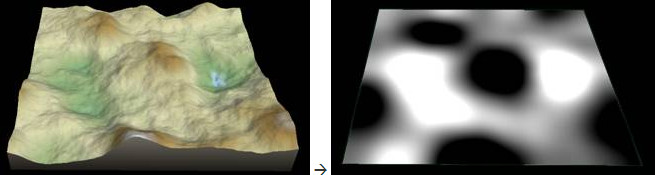
- The mask is black on the convex parts of the terrain, typically mountain tops.
- The mask is white on the concave parts of the terrain, i.e. the valleys.
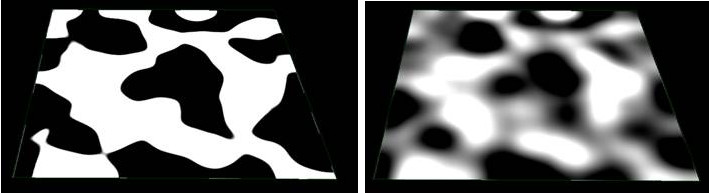
For example, the image below shows the input terrain on the left and the convexity mask on the right.
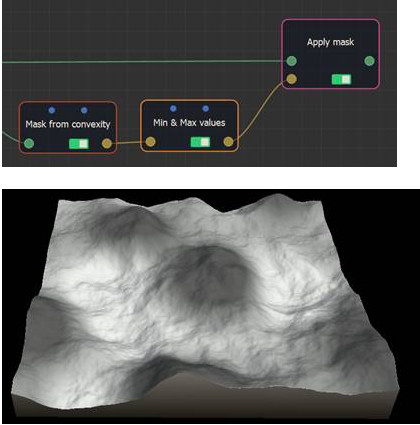
We can then normalize the mask values to between 0.4 and 1, and apply the mask to the terrain.
To add a Mask from convexity node, right-click in the Graph editor and select Create Node > Mask Generation > Mask from convexity.
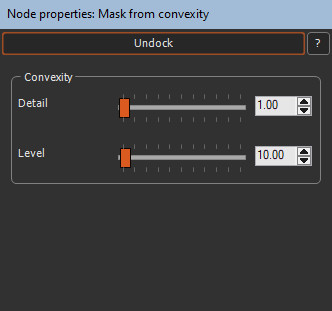
Double click on the node to open its parameters:
Editing a Mask from convexity node
To edit a Mask from convexity node:
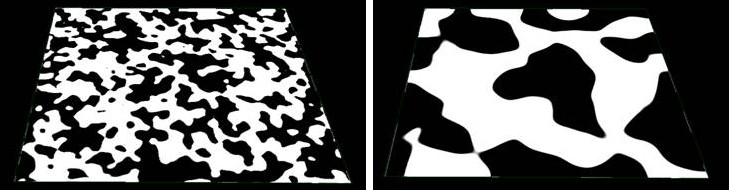
- Detail: Defines the scale of the details to display. In the example below, the left image shows detail = 10 and the right image detail = 50.
- Level: Softens a hard mask. In the example below, the left image shows level = 0 and the right image level = 80
Convexity and curvature are two closely related terms. This node differs from the Mask from curvature node in the sense that it gives information on a much larger scale (the convexity or the curvature calculated on a very large number of vertices), while the Mask from curvature node provides the convexity or curvature at each of the vertices individually.
Parameters
| Parameter | Use |
|---|---|
| Detail | Defines the scale of the details to display. |
| Level | Softens a hard mask. |