The Painted mask workflow helps you get started with painting masks in the Graph. You can edit the mask as many times as you want and see the results in real time.
You will learn how to:
See also Painted mask node.
Creating height and depth in a terrain
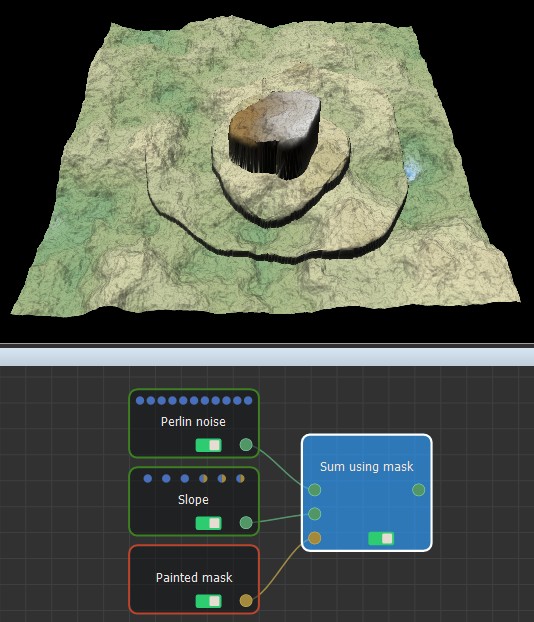
In this workflow, you will compose two terrain generators and paint a mask to create height and depth in the output terrain.
- To begin, right-click in the Graph and select:
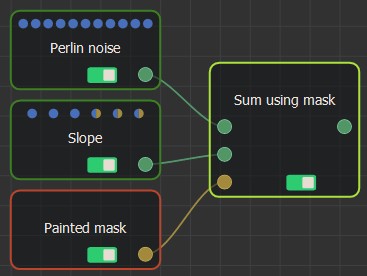
- Create node > Terrain generation > Perlin noise. This node creates a terrain using a Perlin noise generator, one of the generators most frequently used to create a terrain.
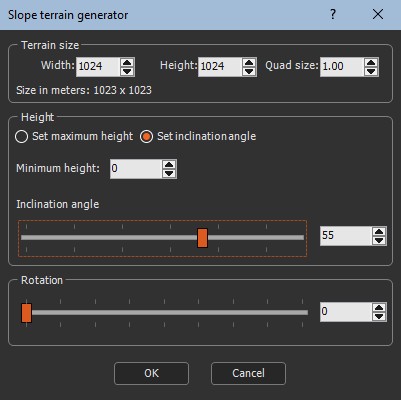
- Create node > Terrain generation > Slope. This node creates a terrain plane with an editable inclination and orientation either by specifying the minimum and maximum height values or by adjusting the slope angle.
- Create node > Mask generation > Painted mask to paint a mask directly in the Viewport.
- Create node > Terrain composition > Sum using mask..This node sums the generators and the mask to create an output terrain.
- Link the nodes as follows.
- Double click on the Slope node to open its parameters.
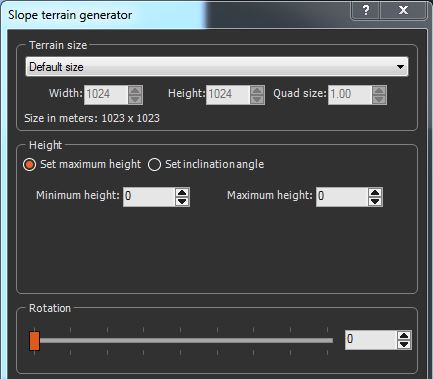
The default inclination angle and minimum and maximum heights is 0. You need to modify these values; otherwise, the Sum using mask node has no effect and the output terrain appears exactly like the Perlin noise input terrain.
- Click Set inclination angle and use the slider to create height in the terrain.
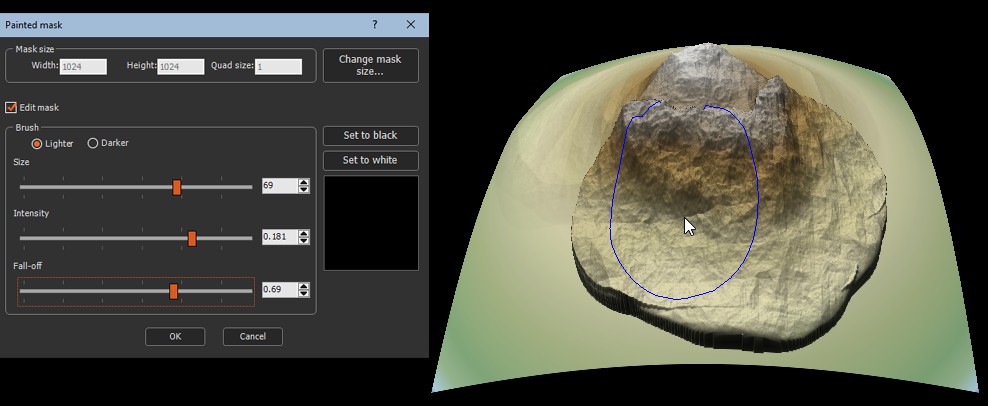
- Double click on the Painted mask node to open its parameters.
- Check the Edit mask box:

- With the Edit mask button activated, use the brush sliders to change the brush size, intensity, and fall-off and draw the mask directly in the Viewport. The mask is updated in real time.
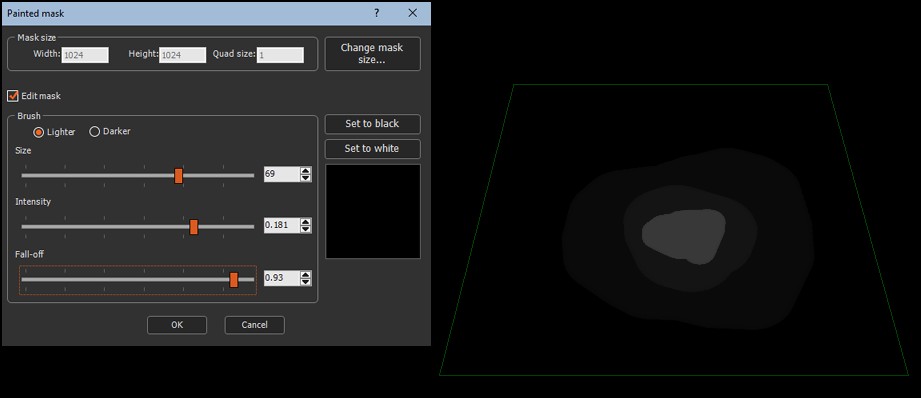
- Lighter allows you to draw the mask and Darker to erase the mask.
- Size slider sets the size of the brush depending on the level of detail that your mask needs.
- Intensity slider sets the intensity of the color of the brush.
- Fall-off creates the appearance of translucency. Use the slider to set the attenuation of the intensity of color from the center. Increasing this value decreases the visibility of the fall-off level displays and vice versa for decreasing the value.
Toggle between the Painted mask node and the
Sum using mask node to see the effects on your terrain in real time
as you draw the mask.
As pressing and holding the left mouse button paints the mask, pan
in the mask by pressing and holding the Shift key
and the left mouse button, and moving the mouse.
- The result creates height where you painted the mask.
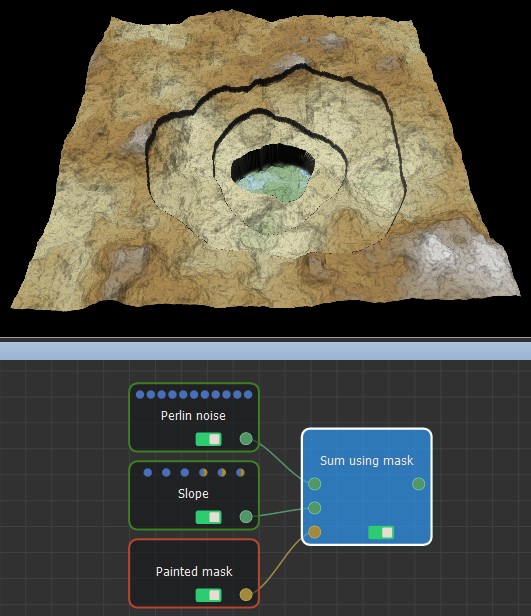
- To create depth in the terrain, set the minimum height to a negative value.
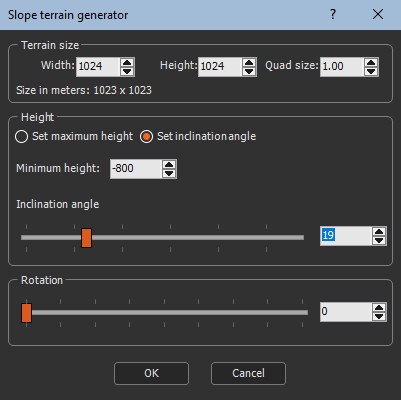
- The result creates depth where you painted the mask.
Creating an alpha composition
In this workflow, you will create an alpha composition between two terrains at locations defined by a mask.
- To begin, right-click in the Graph and select:
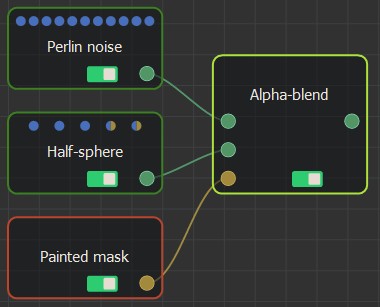
- Create node > Terrain generation > Perlin noise to add the Perlin noise generator.
- Create node > Terrain generation > Half-sphere. This node creates a half-sphere or semi-ellipsoid plot.
- Create node > Mask generation > Painted mask to paint mask in the Viewport.
- Create node > Terrain composition > Alpha blend to create an alpha composition between two terrains at locations defined by a mask.
- Link the nodes as follows so that the Half-sphere appears in the Perlin noise terrain once you have painted the mask.
- Double click the Painted node parameters and check the Edit mask box:
- Set the brush sliders to change the brush size, intensity, and fall-off and draw the mask directly in the Viewport.
Toggle between the Painted mask node and the Alpha blend node to see the effects on your terrain in real time as you draw the mask.
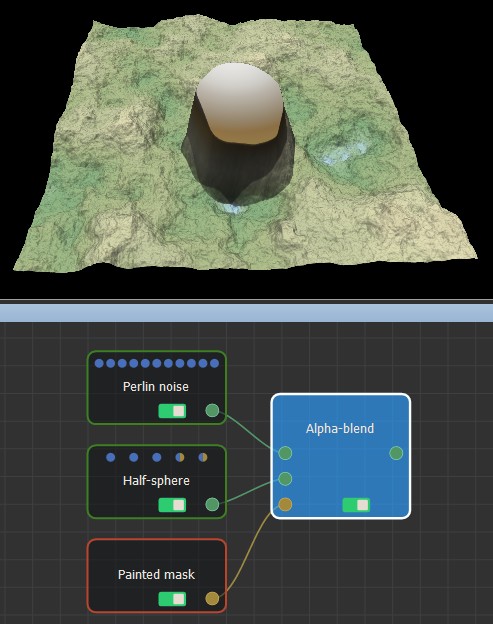
The Half-sphere appears in the Perlin noise in the areas where you drew the mask.
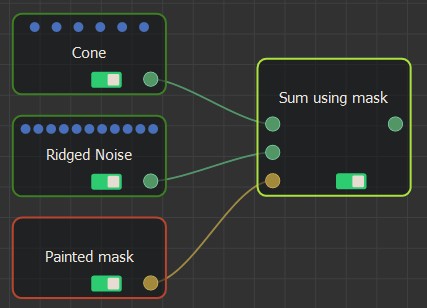
Creating noise in a terrain
In this workflow, you will create Ridged noise in a Cone terrain generator in the areas where you paint a mask.
- To begin, right-click in the Graph and select:
- Create node > Terrain generation > Cone. This node creates a terrain in the form of cone by elevating the terrain from the outside to the center, conically.
- Create node > Terrain generation > Ridged noise. This node creates a terrain using a Ridged noise generator. It creates sharp discontinuities and patterns that resemble crests and ridges. This noise is usually used to create sharp mountains.
- Create node > Mask generation > Painted mask to paint mask in the Viewport.
- Create node > Terrain composition > Sum using masks node to compose the three nodes.
- Link the nodes as follows so that the Ridged noise appears in the Cone terrain once you have painted the mask.
If you linked the Cone node to the first input connector and the Ridged noise to the second input connector, the cone would appear in the Ridged noise terrain.
- Double click the Painted node parameters and check the Edit mask box:
- Set the brush sliders to change the brush size, intensity, and fall-off and draw the mask directly in the Viewport.
Toggle between the Painted mask node and the Sum using mask node to see the effects on your terrain in real time as you draw the mask.
The Ridged noise produces noise in the Cone in the areas where you drew the mask.
Copyright © 2022 · All Rights Reserved · Wysilab