Adding a Material node
Material node - Tutorial video
The Material node creates a material, which can then be applied to terrain with an Apply material node.
A material is a set of repeating textures (tiles) that can be applied to different places on a terrain according to rules based on elevation and slope. Each layer of a material contains exactly one sub-material.
A sub-material contains a set of textures that correspond to a single effect, for example, a rock sub-material or a grass sub-material.
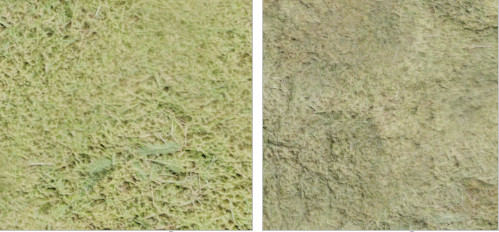
Below is an example of different sub-materials.
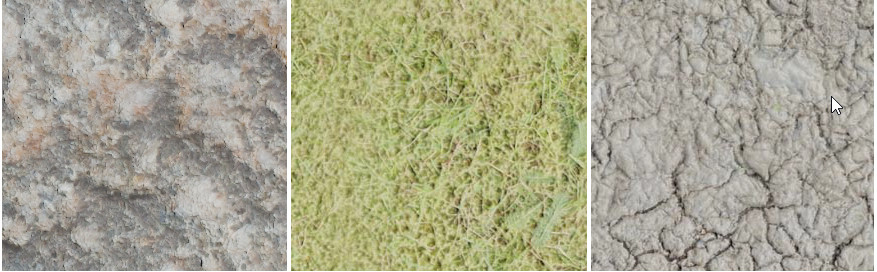
A material allows different sub-materials to be combined together using one sub-material per layer.
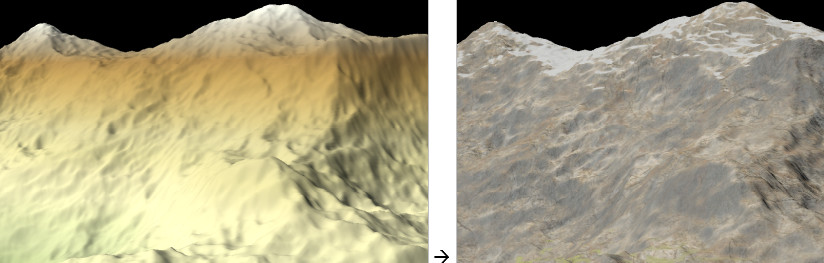
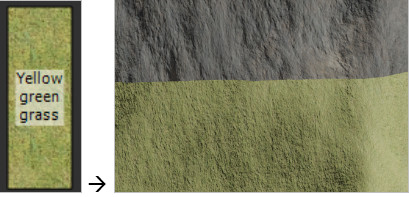
Below is an example of terrain before and after applying the default material:
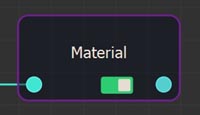
The sub-materials are defined by the input connectors. Each connector corresponds to a layer.
Below is a Material node with one layer:
Below is a Material node with three layer:
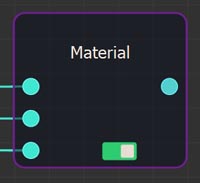
Use a Sub-material node or User sub-material node to create a sub-material and connect it to the Material node.
To add a Material node, right-click in the Graph Editor and select Create Node > Materials > Material or press the keyboard shortcut NMAT (Node MATerial).
Double click on the node to open its parameters.
Editing the Material node
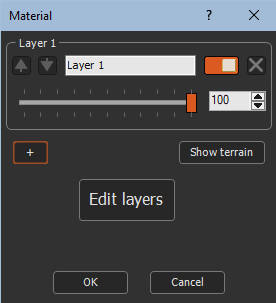
The default Material node contains a single layer:

When connecting a sub-material, the name of the layer uses the name of the sub-material:

- Edit the material name by simply entering a new name.
- If the Material node is linked to an Apply material node, click
 to display in the 3D view the
terrain on which the material is applied.
to display in the 3D view the
terrain on which the material is applied. - Click
 to return to the
display of the material.
to return to the
display of the material. -
 creates a new
layer.
creates a new
layer. - The Intensity slider adjusts the intensity,
i.e. the layer opacity.
If the intensity is equal to 100%, the layer is completely opaque and completely masks the previous layers.
If the intensity is less than 100%, the layer is partially transparent, and reveals the previous layer(s).
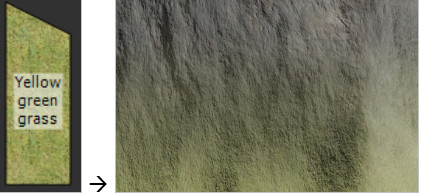
The example below shows a grass layer with an intensity of 100% (left image) and an intensity of 50% right image), which reveals the previous layer, a layer of rock.
Intensity = 100% Intensity = 50%
If all the layers are partially transparent, the color of the terrain color map will be visible, if it has a color map. Otherwise, the color given by the terrain color ramp is visible.
- The different layers of a material are displayed successively.
The order of the layers is therefore important since a layer will
be displayed above the previous ones.
 change the order of the
layers by moving a layer up or down.
change the order of the
layers by moving a layer up or down. disables or enables a
layer, which is useful for viewing the effect of a layer.
disables or enables a
layer, which is useful for viewing the effect of a layer. deletes a layer.
Adjusting the altitude
Once the sub-materials have been chosen, the next step is to determine the places on the terrain where each of the layers will apply. To do this, click on the 'Edit layers' button:

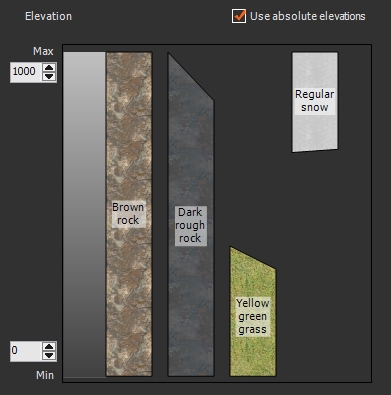
Instant Terra displays the window for editing the material layers:
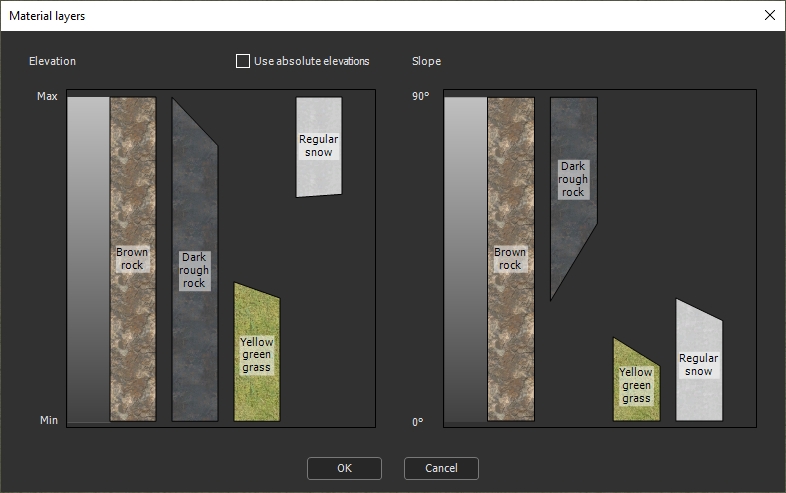
- For each of the layers of the material, you can define the altitude as well as the slope of the zones of the terrain on which the layer of the material will be applied.
The left part of the window is used to define the minimum and maximum altitude of the areas of the terrain on which the material layer will be applied. In the example above,
- The layer containing the Brown rock sub-material is applied everywhere.
- The layer containing the sub-material Yellow-green grass will only be applied to the lowest parts of the terrain, up to a certain altitude.
- The layer containing the Regular snow sub-material will be applied to the highest parts of the terrain.
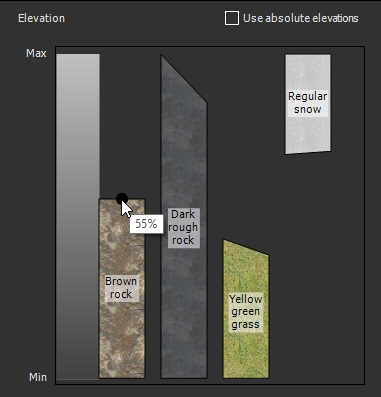
To modify the parameters of a layer, position the mouse cursor on the lower or upper part of the bar representing the layer. A black dot appears. Click on the black dot and move the mouse up or down while holding the button down. Instant Terra displays the altitude limit, between 0% and 100%.
You can define a transition between the layers by tilting more or less the upper part or the lower part of the rectangle representing the layer:
Example of a sharp transition:
Example of a smooth transition:
By default, the minimum and maximum elevations of the layers are relative to the terrain elevations. 0% corresponds to the lowest altitude point and 100% corresponds to the highest altitude point.
- Absolute altitudes in meters can be used by checking the Use absolute elevations box:
The minimum and maximum altitudes in meters to be used can be defined.
Warning: If certain parts of the terrain are located at an altitude lower than the minimum altitude, or at an altitude higher than the maximum altitude, no material layer can be applied to these parts of the terrain.
Adjusting slopes
The right part of the window is used to determine for each layer the minimum slope and the maximum slope of the zones of the terrain on which the layer will be applied.
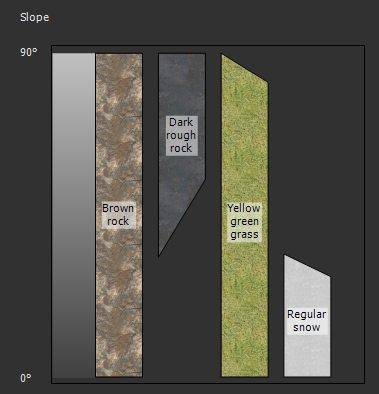
The slope varies from 0° (flat terrain) to 90° (vertical cliff).
Editing is done in the same way as for altitudes.
Both criteria are cumulative. For a layer to be applied to part of the terrain, its altitude AND its slope must respect the limits defined for this layer. If you want to apply a sub-material if the elevation OR the slope is within the limits - or apply a sub-material to both the lower and the upper part of the terrain - you can create multiple layers that will use the same sub-material, and to have different settings for each of the layers.
See also:
Introduction
to materials
Sub-material node
Apply material
node
Simple material
node
Advanced
material
Material
node - Tutorial video
Parameters
| Parameter | Description |
|---|---|
| Show terrain | Displays in the 3D view the terrain on which the material is applied. |
| Show material | Returns to the display of the material. |
| Intensity | Adjusts the intensity, i.e. the layer opacity. |
|
|
Creates a new layer. |
| Size | Adjusts the size of the sub-material. |
| Intensity | Adjusts the intensity, i.e. the layer opacity. |
|
|
Changes the order of the layers by moving a layer up or down. |
|
|
Disables or enables a layer, which is useful for viewing the effect of a layer. |
|
|
Deletes a layer. |
| Edit layers | Determines the places on the terrain where each of the layers will apply. |
| Use absolute elevations | Uses the absolute altitudes in meters. |