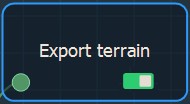
Adding an Export terrain node
This node exports a terrain as an image file. The resulting image is gray scale.
To add an Export Terrain node, right-click in the Graph Editor and select Create Node > Export > Export Terrain.
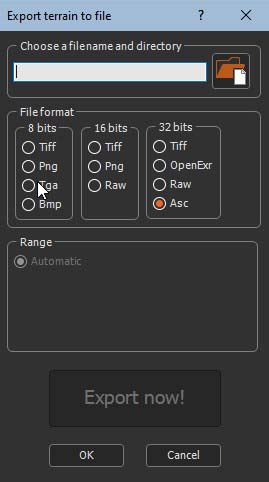
Double click on the node to open its parameters:
Exporting a terrain
See also Exporting all the export nodes in a graph.
To export a terrain:
- Choose a file name and a directory by either dragging and dropping the file into the field, clicking on the folder button and browsing to the file you want to import, or typing the directory of the file to export.
File names with Unicode characters are supported.
If you have already saved your project, type just a file name to export it to the same directory or a sub-directory of your project. This is useful, for example, if you have a second project in the same directory and want to import into it the exported file from the first project. There is no need to type the file directory, just the file name or the sub-directory and file name.
- Choose one of the following File Formats.
Format Extension Description Tiff 8 bits .tif Tagged Image File Format Png 8 bits .png Portable Network Graphics Tga 8 bits .tga Truevision Targa File Bmp 8 bits .bmp Windows or OS/2 Bitmap file Tiff 16 bits .tif Tagged Image File Format Png 16 bits .png Portable Network Graphics Raw 16 bits .raw Raw Image Data File Format Tiff 32 bits .tif Tagged Image File Format OpenExr 32 bits .exr ILM openEXR Raw 32 bits .raw Raw Image Data File Format ARC/INFO ASCII GRID .asc Raster GIS File Format
For 32-bit formats, the heights are saved directly as they are. In this case, there are no values between 0 and 1.
- When available, set the Range:
- Automatic: The gray level of each pixel depends on the height of each vertex and minimum and maximum heights of the terrain vertices (Vertices with a 0 value will have their height set to the min value, and vertices with a 1 value will have their height set to the max value.). The lowest parts of the terrain are black and the highest parts of the terrain are white.
- User defined: The gray level of each pixel depends on the height of each vertex corresponding to the specified Minimum height and Maximum height.
Minimum and maximum terrain values are not
saved in the image file.
The range is not available when exporting to a 32-bit image file,
because in this case, the terrain is exported using the real
heights and not values between 0 and 255 (for 8 bits) or between 0
and 65535 (for 16 bits).
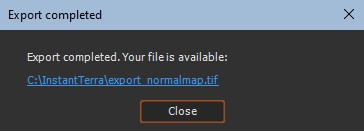
- Click the Export now! button, which triggers the terrain calculation and saves it in the file once the terrain is completely created.

The export is confirmed by a pop-up dialog:
Exporting geographic information
The Tiff (8-bit, 16-bit, or 32-bit) and Asc formats are used to store geographic information, such as the longitude and latitude coordinates of the terrain. If the terrain was imported from a file in the same Tiff format or Asc, which contains geographic information, this information is read and kept by Instant Terra, and then written during the export.
If the terrain size has been modified (for example, with a Crop node), the geographic information may no longer be valid.
Parameters
| Parameter | Use |
|---|---|
| File name | Name of the file in which the image will be saved |
| File format | Format of the file to be created |
| Minimum height | Specify the lowest height of the file to be created |
| Maximum height | Specify the highest height of the file to be created |