Adding a Render terrain node
This node renders a terrain and exports it as an RGB image.
To add a Render Terrain node, right-click in the Graph Editor and select Create Node > Export > Render Terrain or press the keyboard shortcut N-E-R (Node Export Render).
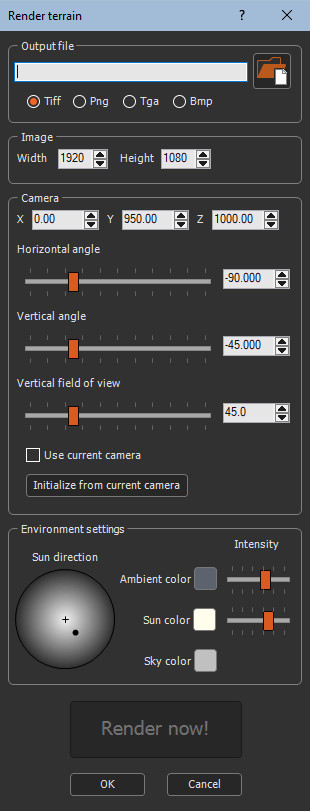
Double click on the node to open its parameters:
Rendering a terrain
To render a terrain, set the following parameters:
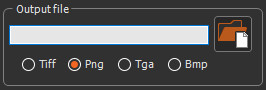
- Output file: Specifies the name of the output file and its format. The following formats are available: Tiff, Png, Tga and Bmp.
- Image: Specifies the height and width of the output file.
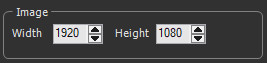
- The default size is 1920 x 1080.
- The minimum size is 48 x 32.
- The maximum size is 8192 x 4320.
- Camera: Specifies the position, orientation,
and field of view of the camera.
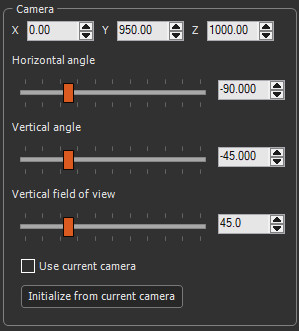
These values ​can be edited in the parameters window, but it is often more practical and efficient to directly position and orient the camera in the 3D view and once the correct position has been found, click on the Initialize from current camera button to update the parameters with the position and orientation of the current camera.
When Use current camera is checked, the node parameters are constantly updated when moving the camera in the 3D view. When in this mode, the Initialize from current camera button is no longer useful and is therefore grayed out. When the option is not checked, the node parameters are not updated automatically when moving the camera. To update them, click once on the Initialize from current camera button.
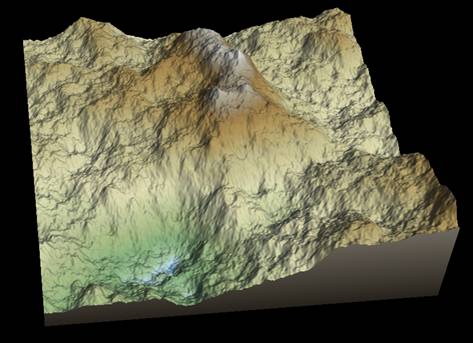
The camera's Vertical field of view is related to its focal length. With a low value, for example 20° vertical field of view, we have the equivalent of a high magnification. We get closer to an isometric perspective and the terrain is not very distorted:
With a high value, for example 120° vertical field of view, we have the equivalent of a “fisheye†lens and the terrain is very distorted:
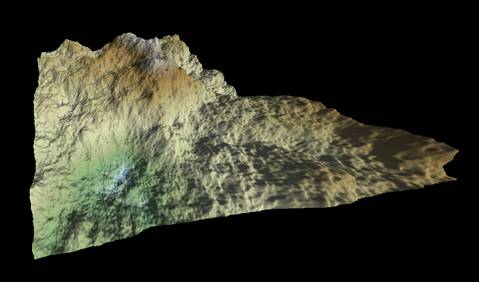
A value of 45 ° generally gives good results.
When the Render terrain node is selected, the current camera is updated, including its field of view. However, this value is not saved. To save this value, select Camera > Camera settings.
- Environment settings: Specifies the position, color and intensity of the sun, the ambient color and its intensity, and the color of the sky.
- Sun direction: The point inside the circle is the position of the sun. When the point is in the center of the circle, the sun is at the zenith and the light is perpendicular to the terrain. The closer the point gets to the edge of the circle, the lower the sun. A point on the edge of the circle corresponds to a sun on the horizon with low-angled light.
- Ambient color: A color is applied to the entire terrain, both illuminated and shadowed faces.
- Sun color: Sets the color of the sun.
- Sky color: Sets the color of the sky.
When the Render terrain node is selected, the
environment values of the 3D view are updated. However, these
values are not saved. To save these values, select Edit
> Preferences > Environment settings. See Setting the
environment for details.
Similarly, to modify the color of the terrain edges, display water,
and choose its altitude, color and opacity, select Edit
> Preferences > Environment settings.
To display a mannequin in the field, select View > Show
mannequin. See
Displaying the mannequin for details.
- Render now!: Once all the parameters are
configured correctly (do not forget to click on the
Initialize from current camera button if the
camera has been moved), click on Render now! to
start rendering and saving the result.
A window opens and shows the progress of the calculation and the export:

Click Cancel to cancel the operation.
Once rendering and exporting is complete, the following window is displayed:.
Parameters
| Parameter | Use |
|---|---|
| Output file | Specifies the name of the output file and its forma |
| Image | Specifies the height and width of the output file |
| Camera | Specifies the position, orientation, and field of view of the camera |
| Horizontal angle | Specifies the horizontal angle of the camera |
| Vertical angle | Specifies the vertical angle of the camera |
| Vertical field of view | Specifies the vertical field of view the camera |
| Initialize from current camera | Updates the parameters with the position and orientation of the current camera |
| Environment settings | Specifies the position, color and intensity of the sun, the ambient color and its intensity, and the color of the sky. |
| Sun direction | Sets the sun's direction |
| Ambient color | Applies a color to the entire terrain, both on the illuminated and shadowed faces |
| Sun color | Sets the sun's color |
| Sky color | Sets the sky's color |
| Render now! | Renders and saves the result |